시작하기
이번에는 random number generator 예제를 통해 소스코드 디버깅 시 유용한 NRF_LOG_INFO 함수 사용법을 같이 알아보도록 하자.
\examples\peripheral\rng\pca10040\blank\ses 폴더에서 프로젝트를 실행하자.
#include "nrf_log.h"
#include "nrf_log_ctrl.h"
#include "nrf_log_default_backends.h"


#define RANDOM_BUFF_SIZE    16      /**< Random numbers buffer size. */

/** @brief Function for getting vector of random numbers.
 *
 * @param[out] p_buff       Pointer to unit8_t buffer for storing the bytes.
 * @param[in]  length       Number of bytes to take from pool and place in p_buff.
 *
 * @retval     Number of bytes actually placed in p_buff.
 */
static uint8_t random_vector_generate(uint8_t * p_buff, uint8_t size)
{
    uint32_t err_code;
    uint8_t  available;

    nrf_drv_rng_bytes_available(&available);
    uint8_t length = MIN(size, available);

    err_code = nrf_drv_rng_rand(p_buff, length);
    APP_ERROR_CHECK(err_code);

    return length;
}

/** @brief Function for main application entry.
 */
int main(void)
{
    uint32_t err_code;

    err_code = NRF_LOG_INIT(NULL);
    APP_ERROR_CHECK(err_code);

    NRF_LOG_DEFAULT_BACKENDS_INIT();

    err_code = nrf_drv_rng_init(NULL);
    APP_ERROR_CHECK(err_code);

    NRF_LOG_INFO("RNG example started.");

    while (true)
    {
        uint8_t p_buff[RANDOM_BUFF_SIZE];
        uint8_t length = random_vector_generate(p_buff,RANDOM_BUFF_SIZE);
        NRF_LOG_INFO("Random Vector:");
        NRF_LOG_HEXDUMP_INFO(p_buff, length);
        NRF_LOG_INFO("");
        NRF_LOG_FLUSH();
        nrf_delay_ms(100);
    }
}
rng 예제는 100ms 마다 랜덤 한 숫자를 만들어서 이를 보여주는 간단한 예제이다.
기본적으로 UART를 통해 NRF_LOG_INFO를 출력하도록 설정되어 있어 USB to UART 컨버터가 없으면 확인할 수 없는 문제가 있다.
USB to UART 컨버터를 구매해서 사용하면 확인할 수 있지만 nRF52832는 사용 가능한 UART가 1개뿐이다.
만약에 UART를 사용하여 센서 사용이나 외부와 통신(RS-232/485 등)을 하게 되면 문제가 발생할 수 있다.
그래서 SES에서 Debug Terminal로 NRF_LOG_INFO를 통해 출력하는 방법에 대해서 알아보도록 하자.
// <e> NRF_LOG_ENABLED - nrf_log - Logger
//==========================================================
#ifndef NRF_LOG_ENABLED
#define NRF_LOG_ENABLED 1
#endif

// <q> NRF_FPRINTF_FLAG_AUTOMATIC_CR_ON_LF_ENABLED  - For each printed LF, function will add CR.


#ifndef NRF_FPRINTF_FLAG_AUTOMATIC_CR_ON_LF_ENABLED
#define NRF_FPRINTF_FLAG_AUTOMATIC_CR_ON_LF_ENABLED 0
#endif

//==========================================================
// <e> NRF_LOG_BACKEND_RTT_ENABLED - nrf_log_backend_rtt - Log RTT backend
//==========================================================
#ifndef NRF_LOG_BACKEND_RTT_ENABLED
#define NRF_LOG_BACKEND_RTT_ENABLED 1
#endif

// <e> NRF_LOG_BACKEND_UART_ENABLED - nrf_log_backend_uart - Log UART backend
//==========================================================
#ifndef NRF_LOG_BACKEND_UART_ENABLED
#define NRF_LOG_BACKEND_UART_ENABLED 0
#endif
sdk_config.h 파일에서 위와 같이 설정을 변경하고 펌웨어를 다운로드해주자.
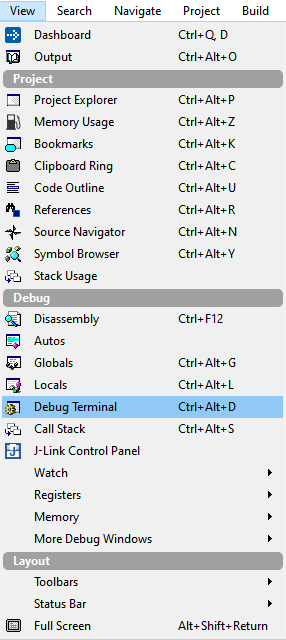
펌웨어가 다운로드되고 나면 메뉴바에서 View - Debug Terminal (Ctrl+Alt+D)를 선택한다.
그럼 하단에 Output으로 되어있는 창이 Debug Terminal 창으로 전환된다.

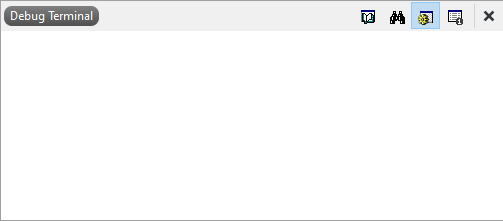
이제 이 상태에서 펌웨어를 동작시켜 보도록 하자.
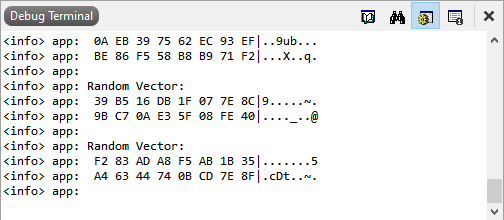
Debug Terminal 창에 NRF_LOG_INFO 출력 메시지가 나타나는 것을 볼 수 있다.
이제 NRF_LOG_INFO 출력을 어떻게 사용하는지 알아보도록 하자.
1. NRF_LOG_INIT 함수와 NRF_LOG_DEFAULT_BACKENDS_INIT 함수를 호출해 NRF_LOG를 사용할 수 있게 설정한다.
2. NRF_LOG_INFO 함수에 출력할 메시지를 전달 인자로 넘겨준다.
3. NRF_LOG_FLUSH 함수를 호출해 메시지를 출력한다.
예제에서는 랜덤 하게 생성된 숫자 배열을 출력하도록 되어 있다.
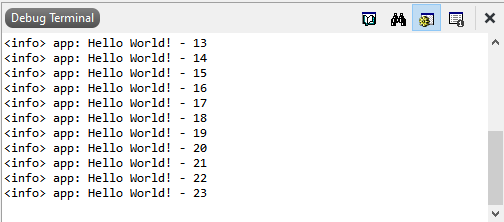
이제 printf 함수를 사용하는 것처럼 해보도록 하자.
int main(void)
{
    uint32_t err_code;
    uint32_t i = 0;

    err_code = NRF_LOG_INIT(NULL);
    APP_ERROR_CHECK(err_code);

    NRF_LOG_DEFAULT_BACKENDS_INIT();

    while (true)
    {
        NRF_LOG_INFO("Hello World! - %d", i);
        NRF_LOG_FLUSH();
        nrf_delay_ms(1000);

        i++;
    }
}
int main(void)
{
    uint32_t err_code;
    uint32_t i = 0;

    err_code = NRF_LOG_INIT(NULL);
    APP_ERROR_CHECK(err_code);

    NRF_LOG_DEFAULT_BACKENDS_INIT();

    while (true)
    {
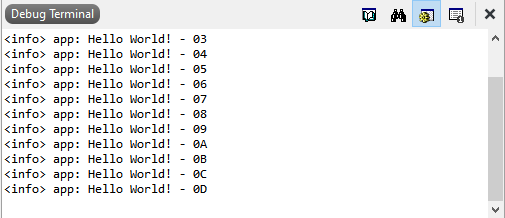
        NRF_LOG_INFO("Hello World! - %02x", i);
        NRF_LOG_FLUSH();
        nrf_delay_ms(1000);

        i++;
    }
}
int main(void)
{
    uint32_t err_code;
    float i = 0.0;

    err_code = NRF_LOG_INIT(NULL);
    APP_ERROR_CHECK(err_code);

    NRF_LOG_DEFAULT_BACKENDS_INIT();

    while (true)
    {
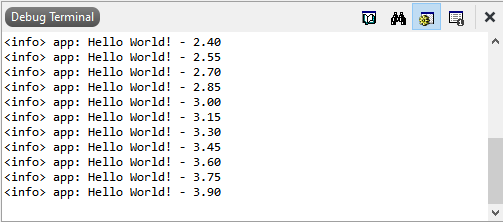
        NRF_LOG_INFO("Hello World! - "NRF_LOG_FLOAT_MARKER"", NRF_LOG_FLOAT(i));
        NRF_LOG_FLUSH();
        nrf_delay_ms(1000);

        i += 0.15;
    }
}
앞으로
rng 예제였지만 실제로는 NRF_LOG_INFO 사용법에 대해서 알아보았다.
이제부터 예제에 있는 메시지 출력은 NRF_LOG_INFO를 이용하면서 살펴볼 예정이다.
'Embedded > nRF52 BLE 개발 안내서' 카테고리의 다른 글
| nRF52 BLE 개발하기 - twi_scanner(I2C) (0) | 2021.01.21 |
|---|---|
| nRF52 BLE 개발하기 - temperature (0) | 2021.01.20 |
| nRF52 BLE 개발하기 - wdt (0) | 2021.01.18 |
| nRF52 BLE 개발하기 - rtc (8) | 2021.01.15 |
| nRF52 BLE 개발하기 - simple_timer (0) | 2021.01.14 |


댓글